1. Introduction
The Remote Phonebook feature of the Yealink phones system allows you to access your corporate directory straight from your phone. You can simply dial a contact number from the corporate directory.
In this guide, we introduce how to configure the remote phone book on MyPBX "Phone Provisioning" page, which can apply to all your Yealink phones at one time, saving your time and human resources.
2. Create a Phone Book File
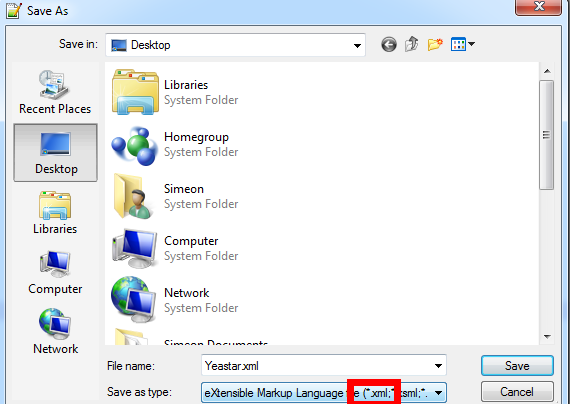
There is a standard format for remote phone book on Yealink IP phones, so we need to create a phone book file (.xml) according to the format.
Since Yealink IP phones can recognize ASCII and UTF-8 for remote phone book, we recommend editing the file with Windows Notepad. Check the format of Yealink remote phone book file below:

As we can see from the above screenshot, a person can has 2 telephone numbers, and there are 3 kinds of telephone number, which can be supported on Yealink.
- digits like 1234567890.
- user@host like 302@192.168.2.121.
- SIP URI like sip:301@192.168.2.121.
We can change the place marked only, the name should be English letters.After editing, we name the file “Yeastar” and save it as a “.xml” file.
3. Upload the Phone Book to MyPBX
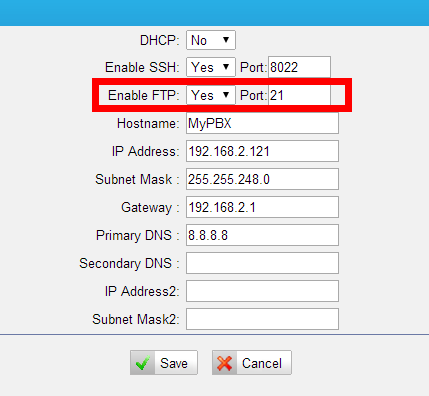
We can upload the phone book to MyPBX via FTP, please make sure FTP is enable on web GUI (System->LAN Settings).
We can upload the phone book to MyPBX via FTP, please make sure FTP is enable on web GUI (System->LAN Settings).
Login via FTP, the default username is root and the password is ys123456.
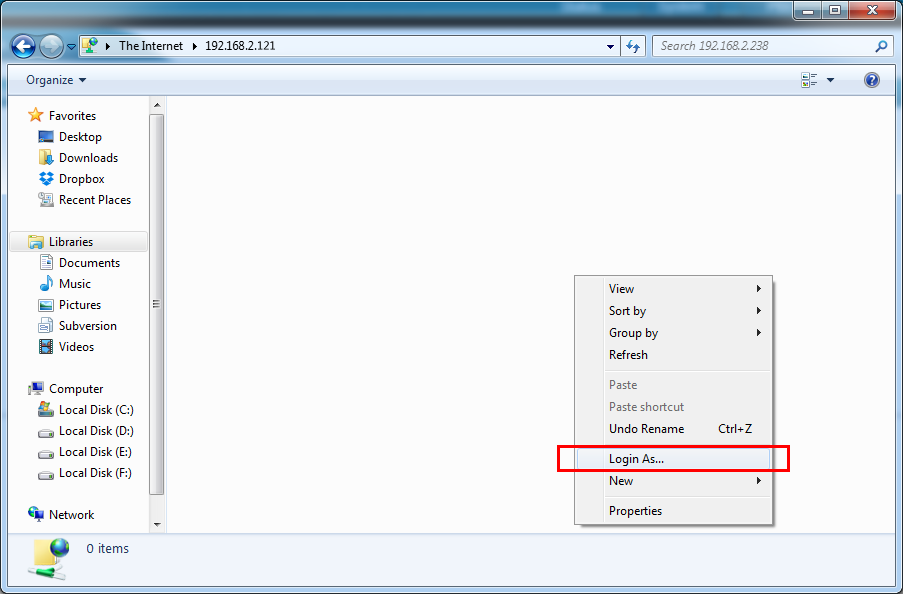
Step1. Open a folder on your PC. Type in ftp://MyPBX’s IP address and press "Enter" key to login. Here we take 192.168.2.121 as an example.
Note: You may see an FTP folder error as bellow, simply click "OK" to ignore it.
Step1. Open a folder on your PC. Type in ftp://MyPBX’s IP address and press "Enter" key to login. Here we take 192.168.2.121 as an example.
Note: You may see an FTP folder error as bellow, simply click "OK" to ignore it.

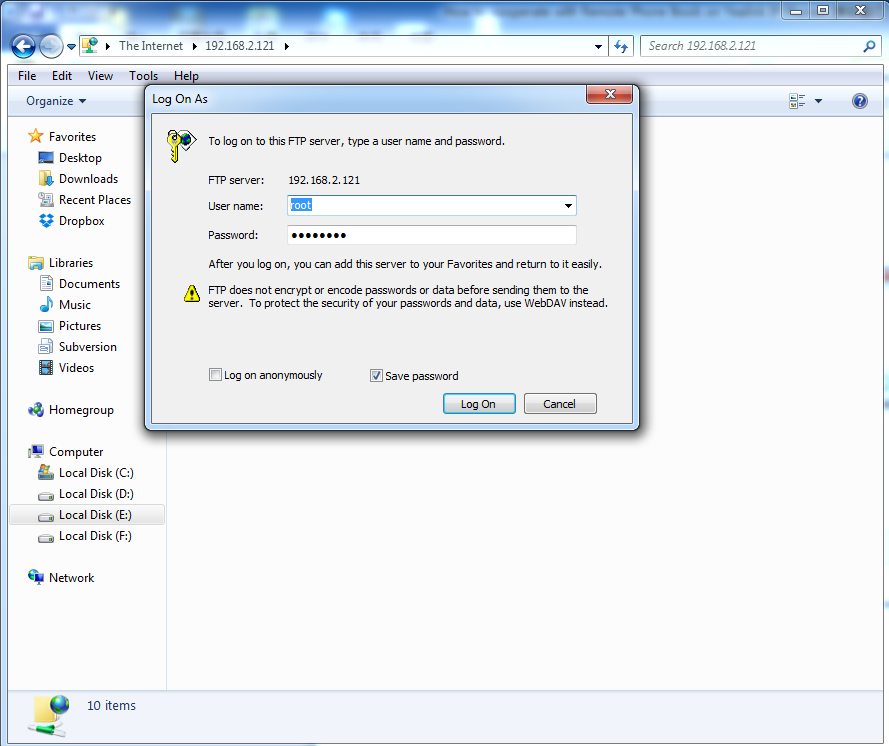
Step2. Right click your mouse, select “Login as”. Fill in the user name and password.
The default User name is “root”, password is “ys123456”. Then click “Log On”.
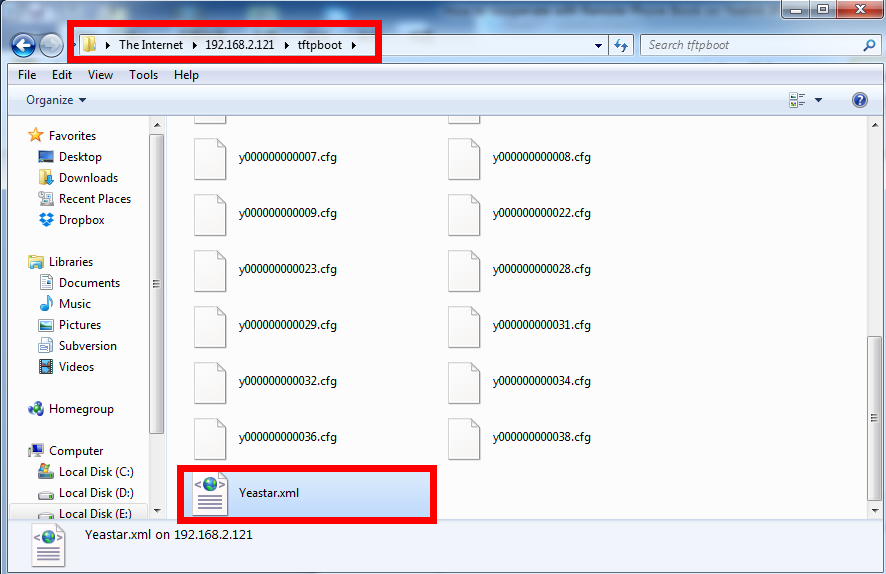
Step3. Enter the folder “tftpboot” and upload phone book file into it.
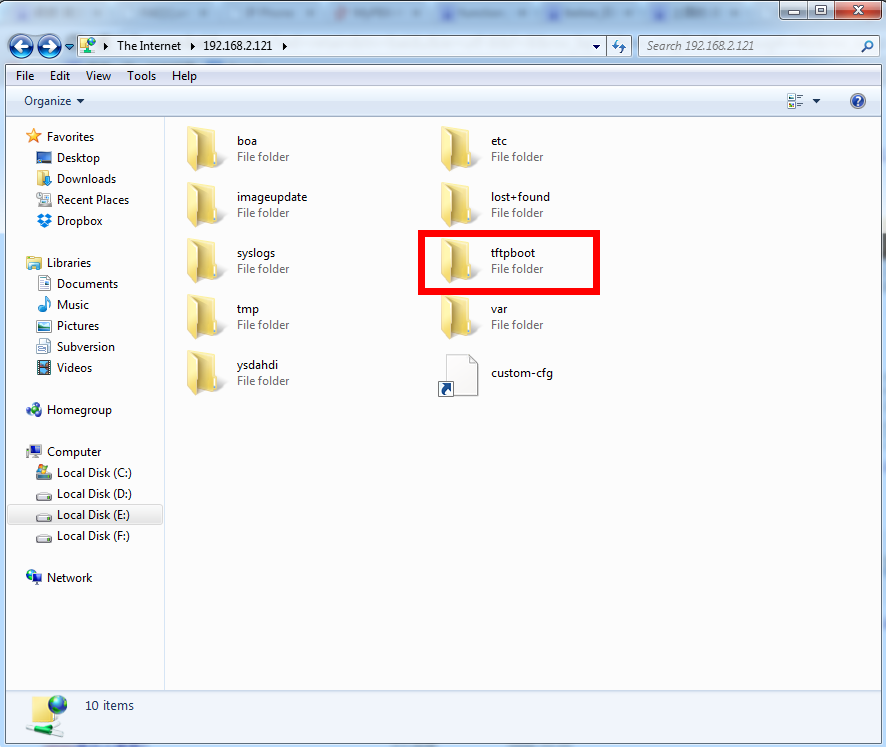
Then upload the phone book file as below.
4. Configure Access URL
MyPBX plays the role of a remote phone book server in this situation. MyPBX can generate URL when you put the phone book file in the directory.
The format of URL:
http://IP of MyPBX/cgi/autop?DownCfg=name of the phone pook
http://IP of MyPBX/cgi/autop?DownCfg=name of the phone pook
In this case, the URL is :
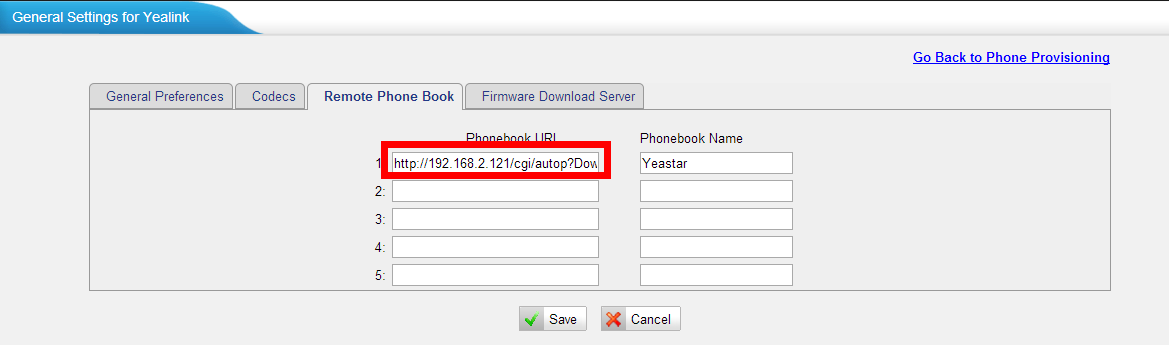
http://192.168.2.121/cgi/autop?DownCfg=Yeastar.xml
192.168.2.121 is the IP of MyPBX, Yeastar.xml is the name of phone book file.
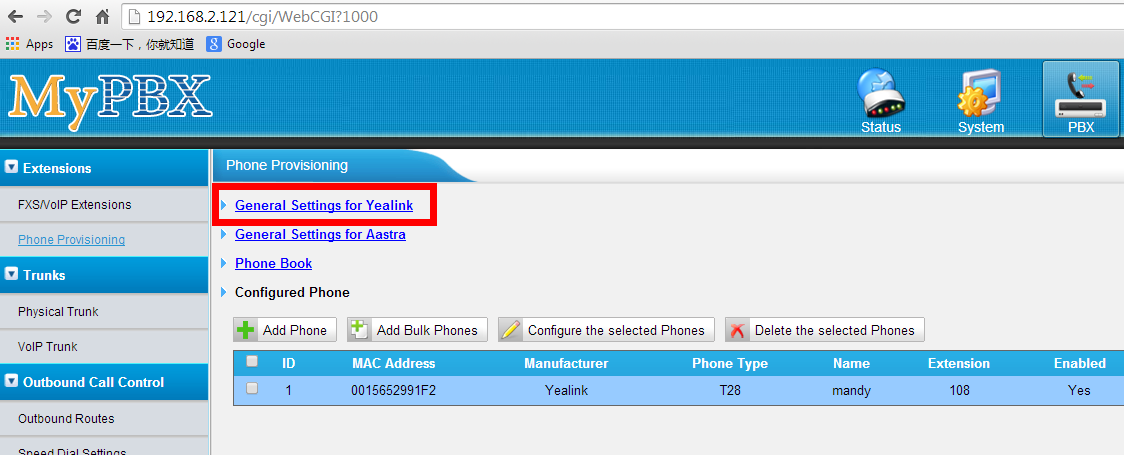
Step1. Go to PBX->Extensions->Phone Provisioning.
Step2. Click Phone Provisioning->General Settings for Yealink.
http://192.168.2.121/cgi/autop?DownCfg=Yeastar.xml
192.168.2.121 is the IP of MyPBX, Yeastar.xml is the name of phone book file.
Step1. Go to PBX->Extensions->Phone Provisioning.
Step2. Click Phone Provisioning->General Settings for Yealink.
Step3. Go to the Remote Phone Book URL field; enter the access URL and the phone book name.
Step4. Click “Save”, all the Yealink IP phones listed on MyPBX “Phone Provisioning” page will get the phone book after manual rebooting.
5. Use Remote Phone Book
After rebooting the Yealink phone, you can access your corporate directory via phone user interface.
Step1. Press Menu-> Directory->Remote Phone Book.
If Remote Phone Book is added to the directory, press Directory->Remote Phone Book to enter remote phone book.
Step2. Select the desired remote group.
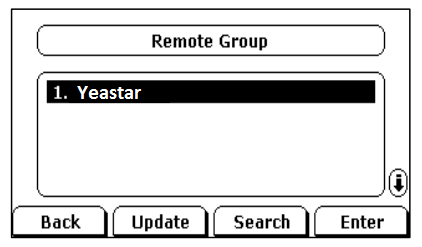
Step3. Press the Enter soft key to load the corporate directory. The following graph shows Contacts in Remote Phone Book "Yeastar".
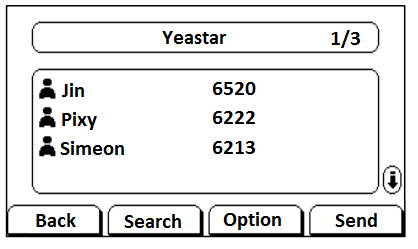
Step4. Press the Back soft key to return to the previous interface.
Note: different IP phone firmware versions may have different phone user interfaces.
Note: different IP phone firmware versions may have different phone user interfaces.
For more details about how to use Remote Phone Book on Yealink phone, please refer to Yealink IP phone user manual.
Appendix A Remote Phone Book File Template
<YeastarIPPhoneDirectory>
<DirectoryEntry>
<Name>Simeon</Name>
<Telephone>6213</Telephone>
<Telephone>1234567890</Telephone>
</DirectoryEntry>
<DirectoryEntry>
<Name>Pixy</Name>
<Telephone>6222</Telephone>
<Telephone>302@192.168.2.121</Telephone>
</DirectoryEntry>
<DirectoryEntry>
<Name>Jin</Name>
<Telephone>6520</Telephone>
<Telephone>sip:301@192.168.2.121</Telephone>
</DirectoryEntry>
</YeastarIPPhoneDirectory>
No hay comentarios:
Publicar un comentario